
Why This Chocolate Panna Cotta Is a Must-Try Dessert
Imagine a dessert that combines the silky smoothness of panna cotta with an indulgent chocolate base and a light cocoa topping. This recipe elevates the classic Italian treat to a star-quality creation you can easily prepare at home. Perfect for dinner parties or a special date night, it offers three distinct layers—each bringing its own texture and flavor—to create a harmonious sensation in every spoonful.
Ingredients for Four Servings
Gather your ingredients in three groups, one for each layer:
Step 1: Preparing the Chocolate Base
Begin by soaking the 3 gelatin sheets in cold water for 5 minutes. Meanwhile, finely chop the dark chocolate and melt it gently over a bain-marie or in short bursts in the microwave, stirring every 20 seconds to prevent scorching.
In a small saucepan, heat the 250 ml cream with the 50 g sugar until it just reaches a simmer. Remove from heat, then immediately whisk this sweetened cream into the melted chocolate until fully combined. Squeeze excess water from the gelatin, add it to the warm mixture, and stir until smooth.
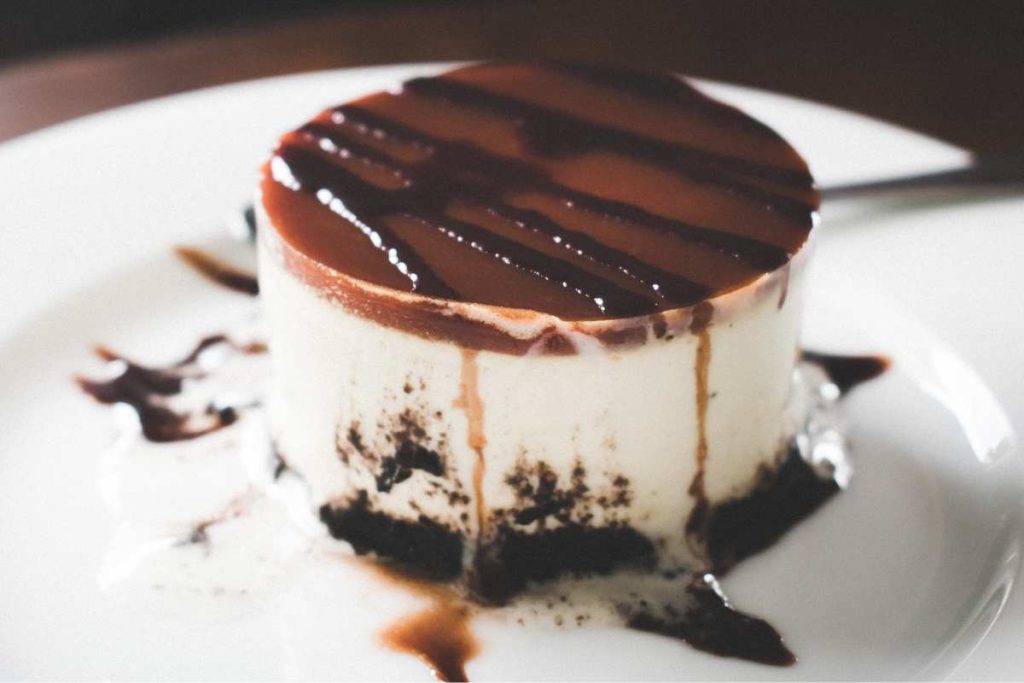
Divide the chocolate mixture evenly among four serving glasses. Place them in the refrigerator for at least 2 hours, or until the base feels firm to the touch.
Step 2: Crafting the Classic Panna Cotta Layer
While the chocolate sets, tackle the panna cotta. Soak the 4 gelatin sheets in cold water for 5 minutes. In another saucepan, heat 500 ml cream with 100 g sugar and the scraped seeds of the vanilla bean (or vanilla extract) just until warm, avoiding a full boil. Remove from heat, squeeze out the gelatin, and whisk it into the cream until dissolved.
Allow the vanilla-infused cream to cool slightly, then gently pour it over the chilled chocolate bases, taking care not to disturb the layer below. Return the glasses to the fridge for 4 hours to achieve a smooth, creamy set.
Step 3: Finishing with Cocoa Topping
For the final flourish, whisk the cocoa topping: sift 2 tbsp unsweetened cocoa powder and 2 tbsp icing sugar into a bowl. Gradually add 50 ml hot water, whisking until a glossy, pourable glaze forms. Let it cool for a minute so it thickens slightly but remains pourable.
Remove the set panna cottas from the fridge and evenly spoon the cocoa glaze atop each. Use the back of a spoon to spread it into a sleek layer. For an extra touch, grate a little dark chocolate over the surface or add a sprinkle of sea salt flakes.
Pro Tips and Variations
Make this dessert your signature by experimenting with these ideas:
Presentation and Serving Suggestions
This three-layered panna cotta looks spectacular in clear glassware to showcase its distinct strata. Garnish with fresh berries, mint leaves, or edible flowers for a pop of color. Serve with a small biscotti or shortbread on the side, and offer guests espresso or a dessert wine like a tawny port to complement the rich chocolate notes.
Timing and Prep Plan
To streamline your evening:
This schedule ensures minimal last-minute work and maximum wow factor when it’s time to delight your guests with a truly refined dessert.